Daytona Plugin
To use the Daytona plugin, Venue.sh requires an OIDC connection to communicate with Daytona APIs. This document outlines the process of creating and setting up the OIDC connection.
Generating Credentials
-
Log in to your Keycloak admin console, which is commonly found at
https://id.<your-company-domain>/. -
Register
venue.shas a client in thedefaultrealm by importing the venue.sh-sample.json configuration:
{
  "clientId": "venue.sh",
  "name": "Venue.sh",
  "description": "Venue.sh Internal Developer Platform",
  ...
  "redirectUris": ["http://localhost:7007/api/auth/daytona/handler/frame/*"],
  "webOrigins": ["http://localhost:3001"],
  ...
}
Update the redirectUris and webOrigins values with your Venue.sh domain, as follows:
"redirectUris": ["https://yourcompany.venue.sh/api/auth/daytona/handler/frame/*"],
"webOrigins": ["https://yourcompany.venue.sh"]
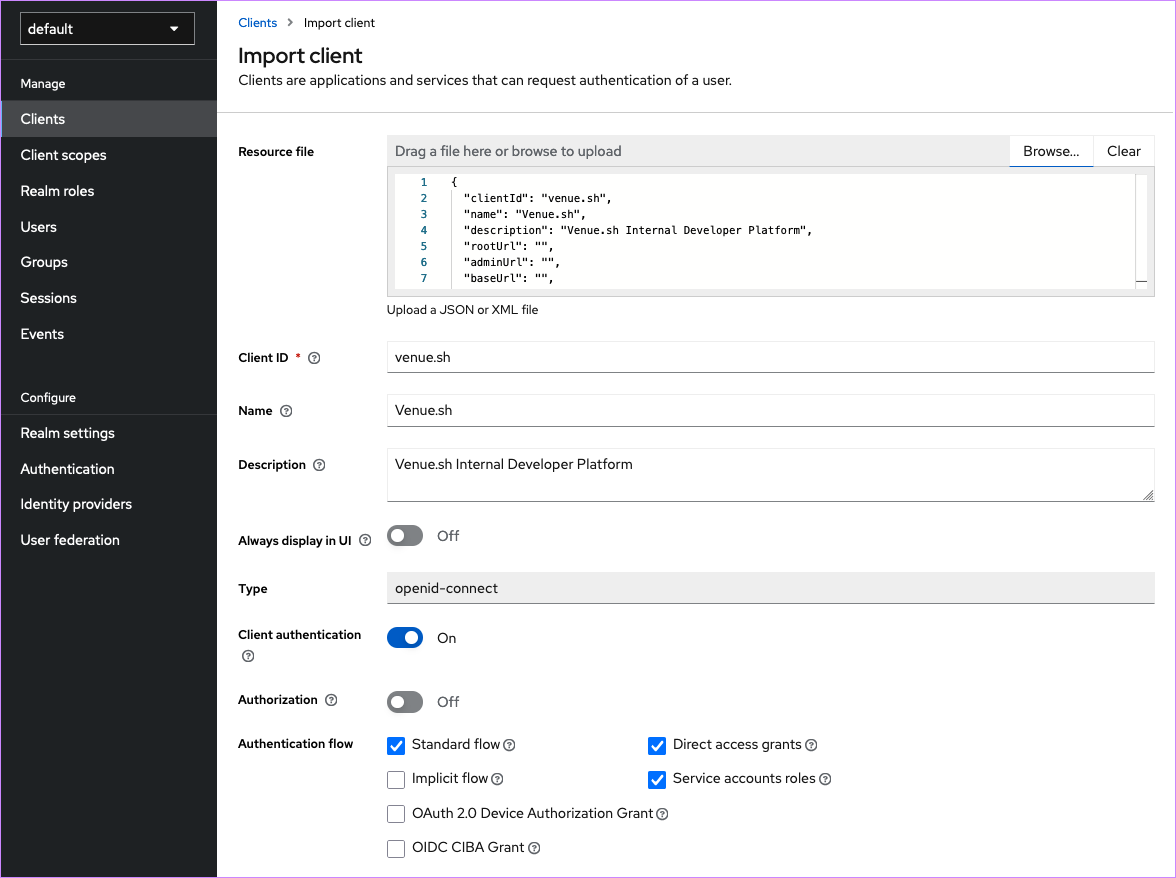
- Click Save to create the client.
Retrieving the client credentials
Once created, you can see the client credentials on the Credentials tab of the Keycloak admin console.
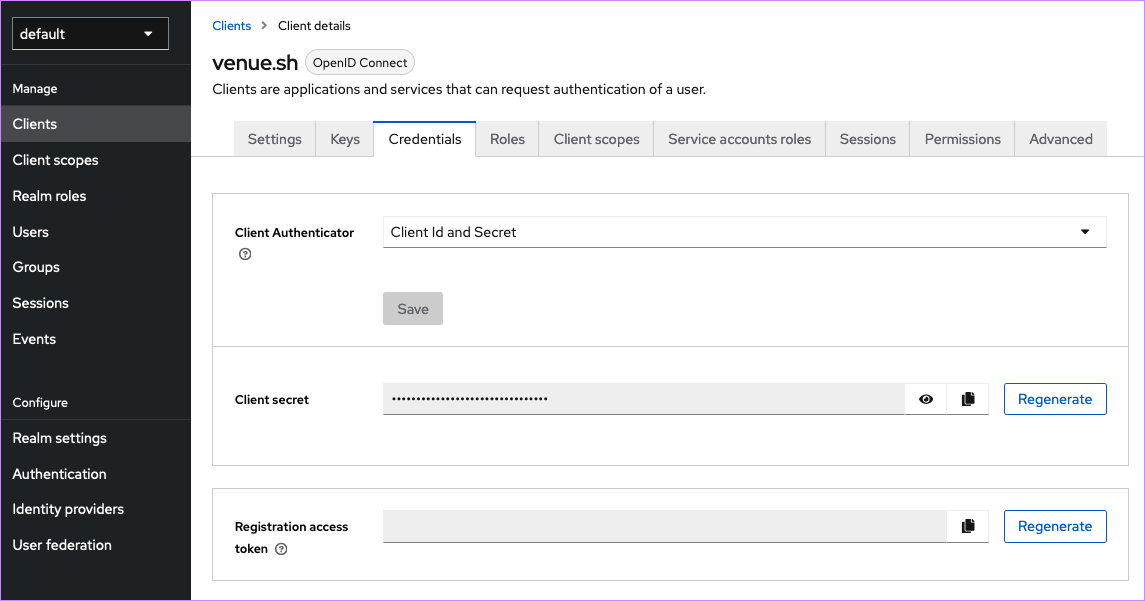
Copy the Client ID and Client Secret values to configure the plugin in Venue.sh.
Configuring the Daytona Plugin in Venue.sh
-
In the Venue.sh app, click Plugins in the left-side navigation.
-
Find Daytona, then click Enable Plugin.
-
Complete the following fields by adding the Keycloak client credentials from the previous section:
- Client ID:
your-client-idfrom the previous section - Client Secret:
your-client-secretfrom the previous section
- Client ID:
-
For the Metadata URL, enter
https://id.<your-company-domain>/auth/realms/default/.well-known/openid-configuration, substituting your own domain. -
Click Enable.
Component Setup
Within your component catalog-info.yaml file, add the following annotations to connect your Daytona project:
metadata:
  annotations:
    daytona.io/repo-url: https://github.com/daytonaio-templates/go